The ability to create interactive games in JavaScript is getting easier with the constant improvements to JavaScript engines and the ability for browsers to utilize the GPU. To demonstrate how easy it is to write games in JavaScript we’re going to write a pong clone.
Getting Started
To write our Pong clone, we’ll be using pure JavaScript and we’ll be utilizing the canvas element in order to render our game.
Let’s create a very simple html page:
<html>
  <head>
    <script src="pong.js"></script>
  </head>
  <body></body>
</html>
We’ll start our pong.js file by getting the correct requestAnimationFrame
invocation:
var animate = window.requestAnimationFrame ||
  window.webkitRequestAnimationFrame ||
  window.mozRequestAnimationFrame ||
  function(callback) { window.setTimeout(callback, 1000/60) };
The requestAnimationFrame
method
is extremely useful. It functions a lot like setTimeout in that it will call
your callback at approximate 60 calls per second (read: 60fps). What makes it
better than just using setTimeout is that your browser can perform
optimizations on the call. For instance, if the tab isn’t active it will stop
making calls until it becomes active again.
In order to perform rendering we’ll need to setup a canvas and grab its 2d context:
var canvas = document.createElement('canvas');
var width = 400;
var height = 600;
canvas.width = width;
canvas.height = height;
var context = canvas.getContext('2d');
Now when the page loads we’ll attach the canvas to the screen and call a step
function using our animate method:
window.onload = function() {
  document.body.appendChild(canvas);
  animate(step);
};
The step function will be responsible for doing three things. First it will
update all of our objects: the player’s paddle, the computer’s paddle, and the
ball. Next it will render those objects. And lastly, it will use
requestAnimationFrame to call the step function again:
var step = function() {
  update();
  render();
  animate(step);
};
To get something on the screen let’s implement update as a no-op and for our
render function we’ll set the background of our game to #FF00FF by using the
fillStyle
and
fillRect
methods provided by the context:
var update = function() {
};

var render = function() {
  context.fillStyle = "#FF00FF";
  context.fillRect(0, 0, width, height);
};
When we load up our page, we should see something like this:
Adding Paddles and the Ball
Let’s add our objects so we can render them to the screen. We’ll create our paddle and give it an x,y position, a width and height, and both an x and a y speed (which we will use later).
function Paddle(x, y, width, height) {
  this.x = x;
  this.y = y;
  this.width = width;
  this.height = height;
  this.x_speed = 0;
  this.y_speed = 0;
}

Paddle.prototype.render = function() {
  context.fillStyle = "#0000FF";
  context.fillRect(this.x, this.y, this.width, this.height);
};
Since each paddle will be controlled independently, one by the player and one by the computer AI, let’s create objects to represent them. The x and y coordinates are chosen to put the player at the bottom (the canvas’s coordinate system’s origin is in the upper left hand corner) and the computer at the top.
function Player() {
   this.paddle = new Paddle(175, 580, 50, 10);
}

function Computer() {
  this.paddle = new Paddle(175, 10, 50, 10);
}
When we render either the player or the computer, we’ll just render their paddles (in the future we could extend this to render their scores as well):
Player.prototype.render = function() {
  this.paddle.render();
};

Computer.prototype.render = function() {
  this.paddle.render();
};
The last object we need to create is the ball. Since the ball will be a circle, the x,y coordinates will represent the center of the circle and we’ll give it a radius of 5:
function Ball(x, y) {
  this.x = x;
  this.y = y;
  this.x_speed = 0;
  this.y_speed = 3;
  this.radius = 5;
}

Ball.prototype.render = function() {
  context.beginPath();
  context.arc(this.x, this.y, this.radius, 2 * Math.PI, false);
  context.fillStyle = "#000000";
  context.fill();
};
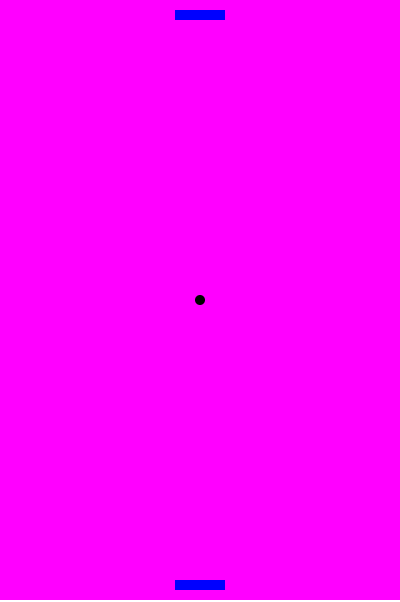
Now we’ll build our objects and update our render function:
var player = new Player();
var computer = new Computer();
var ball = new Ball(200, 300);

var render = function() {
  context.fillStyle = "#FF00FF";
  context.fillRect(0, 0, width, height);
  player.render();
  computer.render();
  ball.render();
};
When we reload the page we should see this:
Animating
Let’s start adding movement. We’ll animate the ball so it heads towards the
player’s paddle. We’ll do this by changing the update from a no-op and adding
an update method to the ball:
var update = function() {
  ball.update();
};

Ball.prototype.update = function() {
  this.x += this.x_speed;
  this.y += this.y_speed;
};
The result should look something like:
Since the paddles are stationary we can make the ball bounce back and forth between them by modifying our update and check to see if the ball hits the left and right hand sides or the top and bottom. We’ll also need to pass both of the paddles into the update method:
var update = function() {
  ball.update(player.paddle, computer.paddle);
};

Ball.prototype.update = function(paddle1, paddle2) {
  this.x += this.x_speed;
  this.y += this.y_speed;
  var top_x = this.x - 5;
  var top_y = this.y - 5;
  var bottom_x = this.x + 5;
  var bottom_y = this.y + 5;

  if(this.x - 5 < 0) { // hitting the left wall
    this.x = 5;
    this.x_speed = -this.x_speed;
  } else if(this.x + 5 > 400) { // hitting the right wall
    this.x = 395;
    this.x_speed = -this.x_speed;
  }

  if(this.y < 0 || this.y > 600) { // a point was scored
    this.x_speed = 0;
    this.y_speed = 3;
    this.x = 200;
    this.y = 300;
  }

  if(top_y > 300) {
    if(top_y < (paddle1.y + paddle1.height) && bottom_y > paddle1.y && top_x < (paddle1.x + paddle1.width) && bottom_x > paddle1.x) {
      // hit the player's paddle
      this.y_speed = -3;
      this.x_speed += (paddle1.x_speed / 2);
      this.y += this.y_speed;
    }
  } else {
    if(top_y < (paddle2.y + paddle2.height) && bottom_y > paddle2.y && top_x < (paddle2.x + paddle2.width) && bottom_x > paddle2.x) {
      // hit the computer's paddle
      this.y_speed = 3;
      this.x_speed += (paddle2.x_speed / 2);
      this.y += this.y_speed;
    }
  }
};
The collision detection happening here is pretty standard Axis Aligned
Bounding
Boxes
or AABBs. You’ll notice in the code that if the paddle is moving when it hits
the ball, the x_speed is added to the ball. This will cause it to move faster
or slower depending on the direction of the ball and the direction of the
paddle.
Controls
Now we’re going to add in controls so that the player can update the position
of their paddle, we’ll do this by adding a keysDown object to keep track of
which key is pressed:
var keysDown = {};

window.addEventListener("keydown", function(event) {
  keysDown[event.keyCode] = true;
});

window.addEventListener("keyup", function(event) {
  delete keysDown[event.keyCode];
});
The update method of the player can now update the position of its paddle depending on which key was pressed:
var update = function() {
  player.update();
  ball.update(player.paddle, computer.paddle);
};

Player.prototype.update = function() {
  for(var key in keysDown) {
    var value = Number(key);
    if(value == 37) { // left arrow
      this.paddle.move(-4, 0);
    } else if (value == 39) { // right arrow
      this.paddle.move(4, 0);
    } else {
      this.paddle.move(0, 0);
    }
  }
};

Paddle.prototype.move = function(x, y) {
  this.x += x;
  this.y += y;
  this.x_speed = x;
  this.y_speed = y;
  if(this.x < 0) { // all the way to the left
    this.x = 0;
    this.x_speed = 0;
  } else if (this.x + this.width > 400) { // all the way to the right
    this.x = 400 - this.width;
    this.x_speed = 0;
  }
}
Computer AI
Now we can control our paddle and the ball will bounce around accordingly;
however, the computer is not very good at the game yet so we’ll need to add a
very simple AI. For this project the computer will just try its best to
position itself according to the center of the ball. We’ll give the computer
player a max speed so that we can occasionally score a point. We’ll need to
alter the main update function as well as update the computer player:
var update = function() {
  player.update();
  computer.update(ball);
  ball.update(player.paddle, computer.paddle);
};

Computer.prototype.update = function(ball) {
  var x_pos = ball.x;
  var diff = -((this.paddle.x + (this.paddle.width / 2)) - x_pos);
  if(diff < 0 && diff < -4) { // max speed left
    diff = -5;
  } else if(diff > 0 && diff > 4) { // max speed right
    diff = 5;
  }
  this.paddle.move(diff, 0);
  if(this.paddle.x < 0) {
    this.paddle.x = 0;
  } else if (this.paddle.x + this.paddle.width > 400) {
    this.paddle.x = 400 - this.paddle.width;
  }
};
And we’re done! We have a working pong clone. To see the code in action you can take a look at this jsfiddle.
As browsers keep getting more powerful, gaming on the web without Adobe Flash will grow quickly. It’s possible that JavaScript will be able to place itself as one of the most accessible and easily learnable languages to create games in.