This article is Part 2 of the Building iOS Interfaces series which tackles *the how and why of implementing iOS designs without prior native programming *experience–perfect for Web designers and developers. You can find the other *articles here: Part 1 – Part 3.
In the previous post, we looked at the different technologies and tools involved in the process of building iOS interfaces, including UIKit. In this article, we will take a closer look at one of the cornerstones of native app design in iOS: views.
Conceptual Overview
As we’ve established previously, UIKit is the framework that wraps all the APIs required to build iOS interfaces. These are organized in distinct boxes that each represent a specific UI control, such as buttons, switches, etc. In object-oriented programming parlance, these are referred to as classes. Each class has a collection of properties that can be used to change its appearance and behavior. They also expose ways to interact with them through functions, which are often referred to as methods in this context.
For instance, the UISwitch class represents the toggle control that is
commonly used in iOS apps. You can change its tint color through its
adequately-named tintColor property, and toggle its on/off status using the
setOn(...) method.

Note that all UIKit classes are prefixed with “UI”, making them easily identifiable in code.
How will this affect my day-to-day work?
Getting familiar with programming concepts such as classes and methods will allow you to change the look and behavior of your views in code. Even though a thorough understanding of these concepts might not be required, it could help shed some light on how things work below the surface.
Views, Views Everywhere
Let’s get this immediately out of the way: anything you see on screen in iOS is a view. Buttons are views. Switches are views. Images are views. You get the idea.
A view, represented by a class, should know how to draw itself on screen and whether to accept user input. Most views expose properties to other parts of the app so that their content and appearance can be updated to reflect the app state.
Just like HTML elements, views can be nested within each other. Unlike their
HTML counterparts, most views don’t inherit the appearance of their parents,
with the notable exception of tintColor, the property that sets the color of
interactive elements. A parent view is referred to as a superview, while a
child view is referred to as a subview. There is no limit to the number of
views you can nest, but it’s always wiser to limit that number for performance
reasons. It’s worth noting that parent views are only responsible of laying out
their subviews, not drawing them.
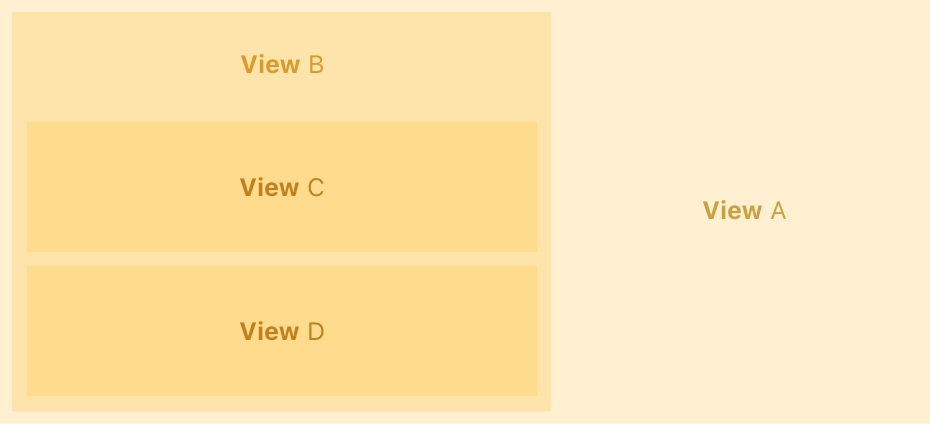
In the example above, view A is the superview of view B, making the latter the subview of the former. Views C and D are both subviews of view B.
How will this affect my day-to-day work?
You will need to organize your UI in a hierarchy of views to make styling and reusing them easier down the road.
UIView
There are cases where all you need is a blank view to use as a subview container
or a drawing canvas. For this purpose, Apple provides a base class that doesn’t
do much on its own and that all other view classes should inherit from:
UIView.
While we’re at it, let’s talk briefly about inheritance. When a class is defined as a subclass of another class, it inherits all of its properties and methods. In this case, the parent class is referred to as a superclass.
For instance, the UISwitch mentioned earlier is a subclass of UIView. This
means that even if the documentation of UISwitch doesn’t
mention anything about a frame property, you can still access and change that
property on any switch control, because its superclass UIView defines
it.

How will this affect my day-to-day work?
Custom interfaces would often require subclassing UIView or one of its
subclasses, so getting familiar with these is a good first step. Additionally,
when looking for a particular property or method on a view class, it’s often
worth looking at its superclasses as well in the “Inherits From” section at the
top of its documentation page. See the UISwitch example.
Interface Builder
So, how do you add and manage views in your project? Depending on who you ask, you will get one of these two answers:
- Using Interface Builder (IB for short), the built-in GUI editor in Xcode.
- Using code (Swift).
These two approaches require different skillsets and affinities, but it’s critical to learn both in order to achieve any meaningful results. On the one hand, IB is far from being a stand-alone design tool in its current form, since customizing even simple things like border width and color requires defining a custom view in code first. On the other hand, using code for view management is the easiest way to bloat the codebase with non-trivial layout code.
Before we delve into code, let’s take a look at a hands-on example of using IB to add a button to our UI.
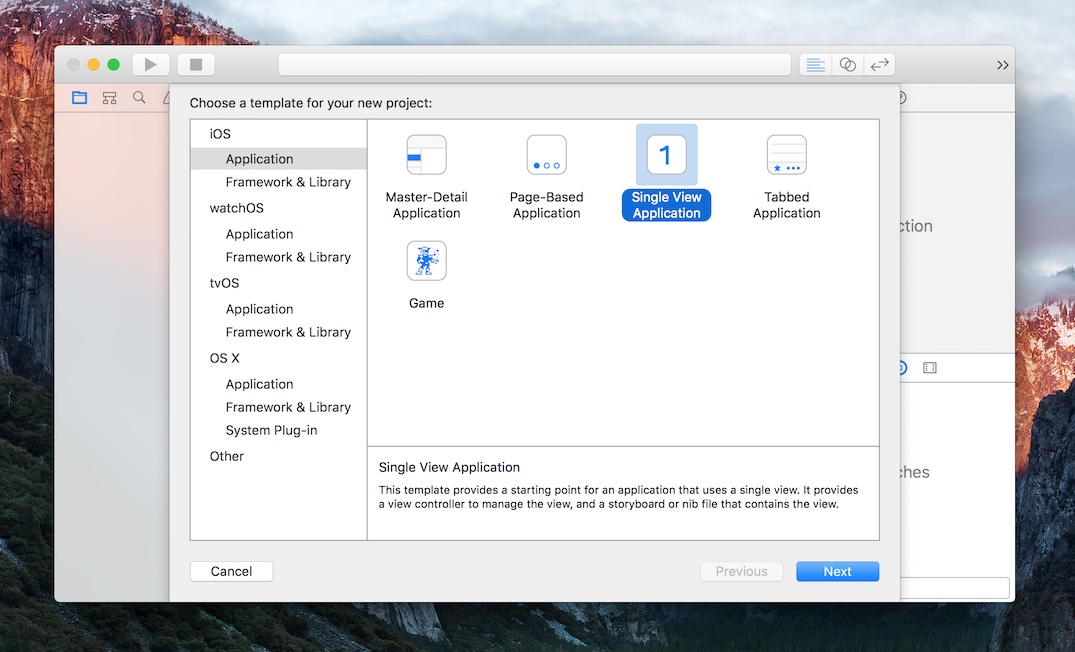
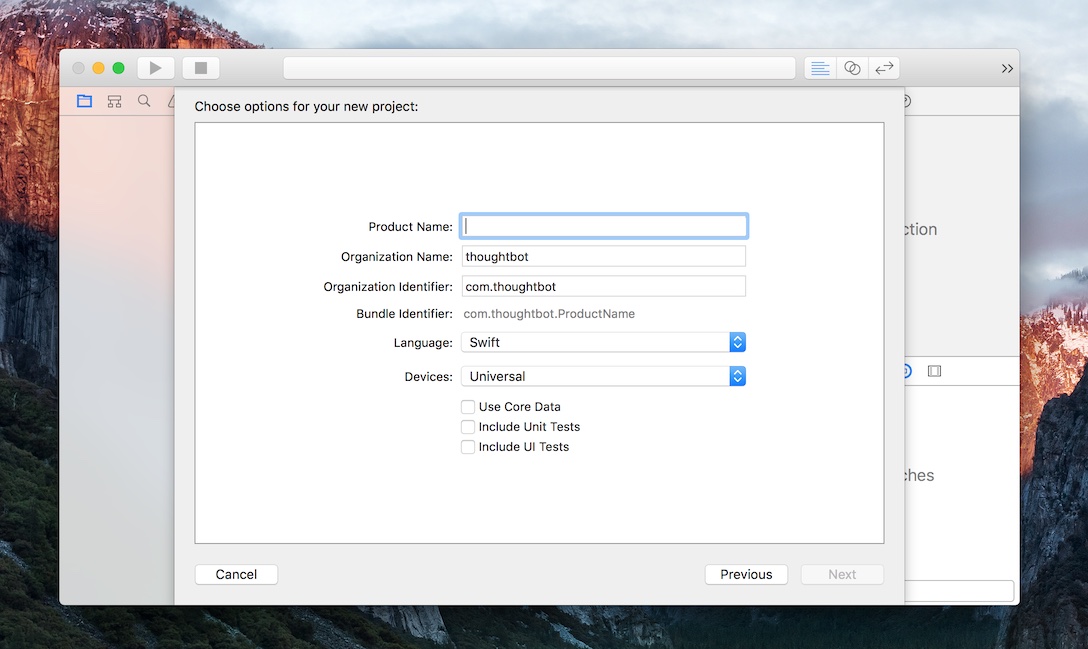
You can start by creating a new “Single View Application” iOS project in Xcode using the File > New > Project… menu item. The product and organization names are irrelevant for this exercise, but they need to be there nevertheless. You can also skip this step by downloading the freshly-created example project.
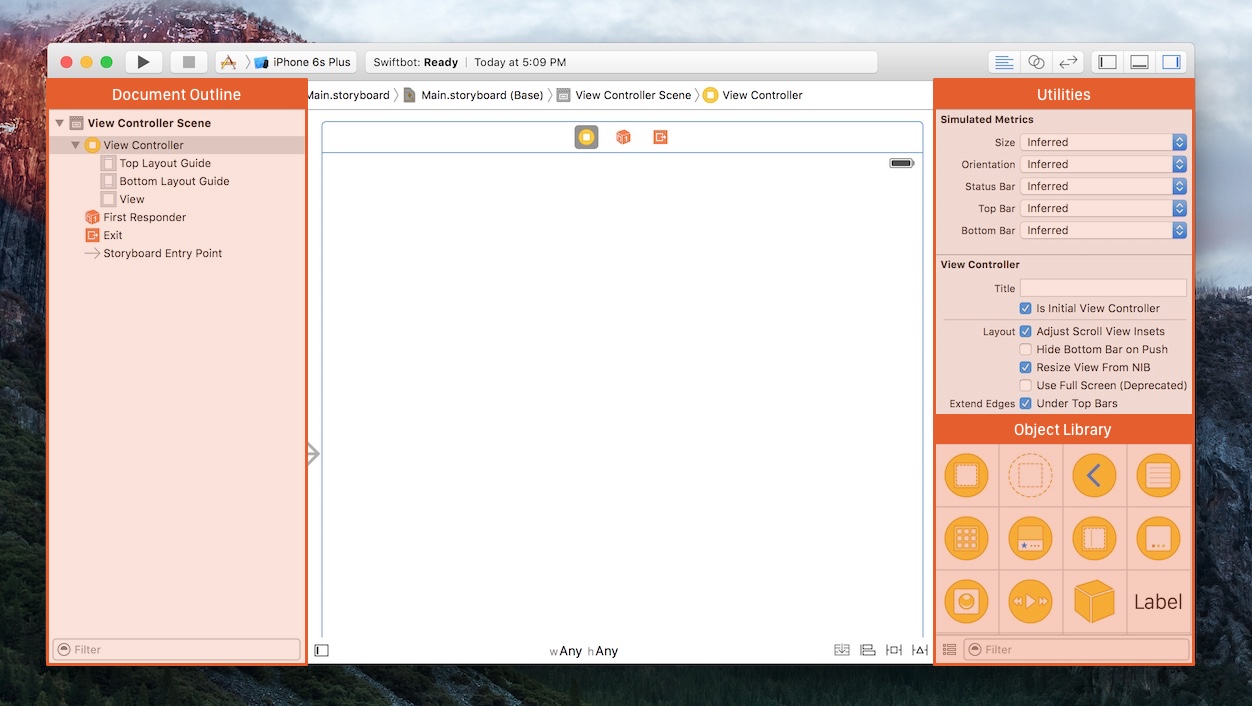
The file we will be working on is the default Main.storyboard which can be
opened using the project navigator in the sidebar.
Storyboards are a container format in IB that allows you to group all your app
screens in one large canvas and create transitions between them. They provide a
cheap but effective way to visualize the user flow and view hierarchy.
Each screen on the editor canvas is referred to as a scene. Our
Main.storyboard has exactly one scene called View Controller Scene, and
that’s where we will be adding our first subview. You can easily list and
navigate between scenes and views using the tree view in the Document
Outline pane.

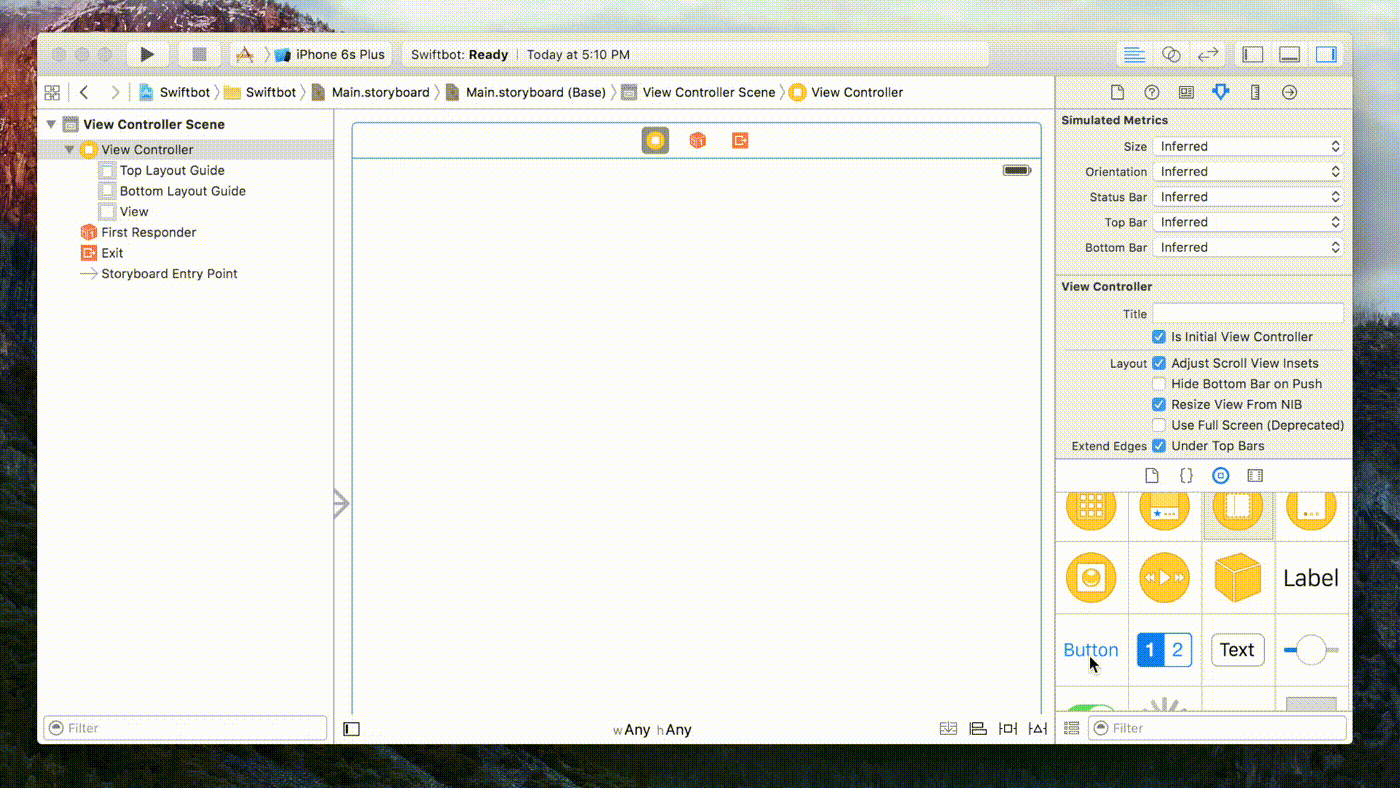
To add a new view to our scene, we need to first locate the Object Library, which acts like an inventory of built-in views and controls. At the very bottom of the right sidebar (referred to as Utilities), you can bring up the Object Library by clicking the 3rd icon in the horizontal tab bar. Keep in mind that you can show or hide both sidebars using the right-most button group in the window top bar.
Drag-and-drop a button (UIButton) from the object list to the View Controller
Scene. This will effectively add a new button instance to our main view.
You can preview the outcome by running the app in the Simulator using Cmd+R
or the triangle button at the top-left corner of the window. Auto Layout is
outside the scope of this article, but it’s worth noting that the button is not
centered in the view because we haven’t set up any layout constraints.
Next Steps
Now that we’ve established that views are the bread and butter of iOS interfaces and introduced Interface Builder with a hands-on example, it’s time to take a closer look at how we can customize our views using code. That will be the topic of the next article in this series.