Optimising images for your website can be a bit of a black art, but it’s well worth doing as the bandwidth savings can be large. It will also make a big difference to the speed at which your site loads.
Why?
These days many of us have access to very fast broadband (we typically have 100Mb/s connections here at thoughtbot) but not everybody has access to this sort of connection. Most people worldwide are still stuck on relatively slow ADSL packages that run at no more than 2Mb/s or so.
Mobile connections have come a long way in recent years, but the variability of speed is even worse than wired connections. 4G can be as fast as good broadband, but in areas with high contention or in areas where there is no 3G or 4G mobile connections can be as slow as mud.
Whatever the speed of the connection it’s worth optimising your images as visitors are far more likely to abandon your site if it takes more than a few seconds to load and search engines will rank your site higher if it loads quickly. It’s also worth remembering that even fast broadband connections often have data caps.
Size
The first thing to do is make sure the pixel dimensions of the image are appropriate. Browsers are much better than they used to be at resizing images as they are rendered, but it is a waste of bandwidth to be sending an image that is bigger than the size that is specified by the markup or CSS.
The context in which the image is displayed should inform the size as well. For example, a full width background image without much detail may work just as well if sized a bit smaller and this is an opportunity to save some bandwidth. Conversely a full-size product shot should probably be sized such that it retains plenty of detail.
Sometimes it is appropriate to send an image that is bigger than the size it will be rendered. For example, you might have a 2x version of a logo that is intended for HiDPI/Retina displays, and the file size may not be significantly large that it’s worth rendering a 1x version as well and adding the complexity needed to deal with swapping the images.
Format
So you’ve finished working on your image, and made sure it’s the right size. What format do you choose to export it? Well, that depends on the kind of image.
When it comes to web images there are a number of formats to choose from, but the only two you really need to worry about right now are JPEG and PNG.
The JPEG file image format was created by the Joint Photographic Experts Group and, as you might expect, was optimised for storing photographic images. It uses efficient lossy compression for storing photographic images, as the artefacts that result from the compression blend well into photographs with detailed non-uniform textures. These artefacts makes it a poor choice for storing graphic images and logos however. Because the compression is lossy it means that you will lose information in the image which cannot be recovered. This means that you should keep a master copy of your image and only export to JPEG when you are ready to publish it to the web.
The PNG format was designed as a replacement for the then patent-encumbered GIF format. It is a lossless format, able to store images in a variety of colour depths, with either 1 bit or 8 bit alpha transparency. This makes it ideal for storing graphic images with strong lines and flat areas of colour. It is also very good at pristinely storing photographs, but because it’s lossless, the resulting file sizes end up being unwieldy for web use so it’s better to use JPEG for photos.
Optimising JPEG
When saving your images for the web it is usually best to use the “Web Export…” feature of your image editor. I’ll be using Photoshop in my examples, but most other similar apps have this feature.
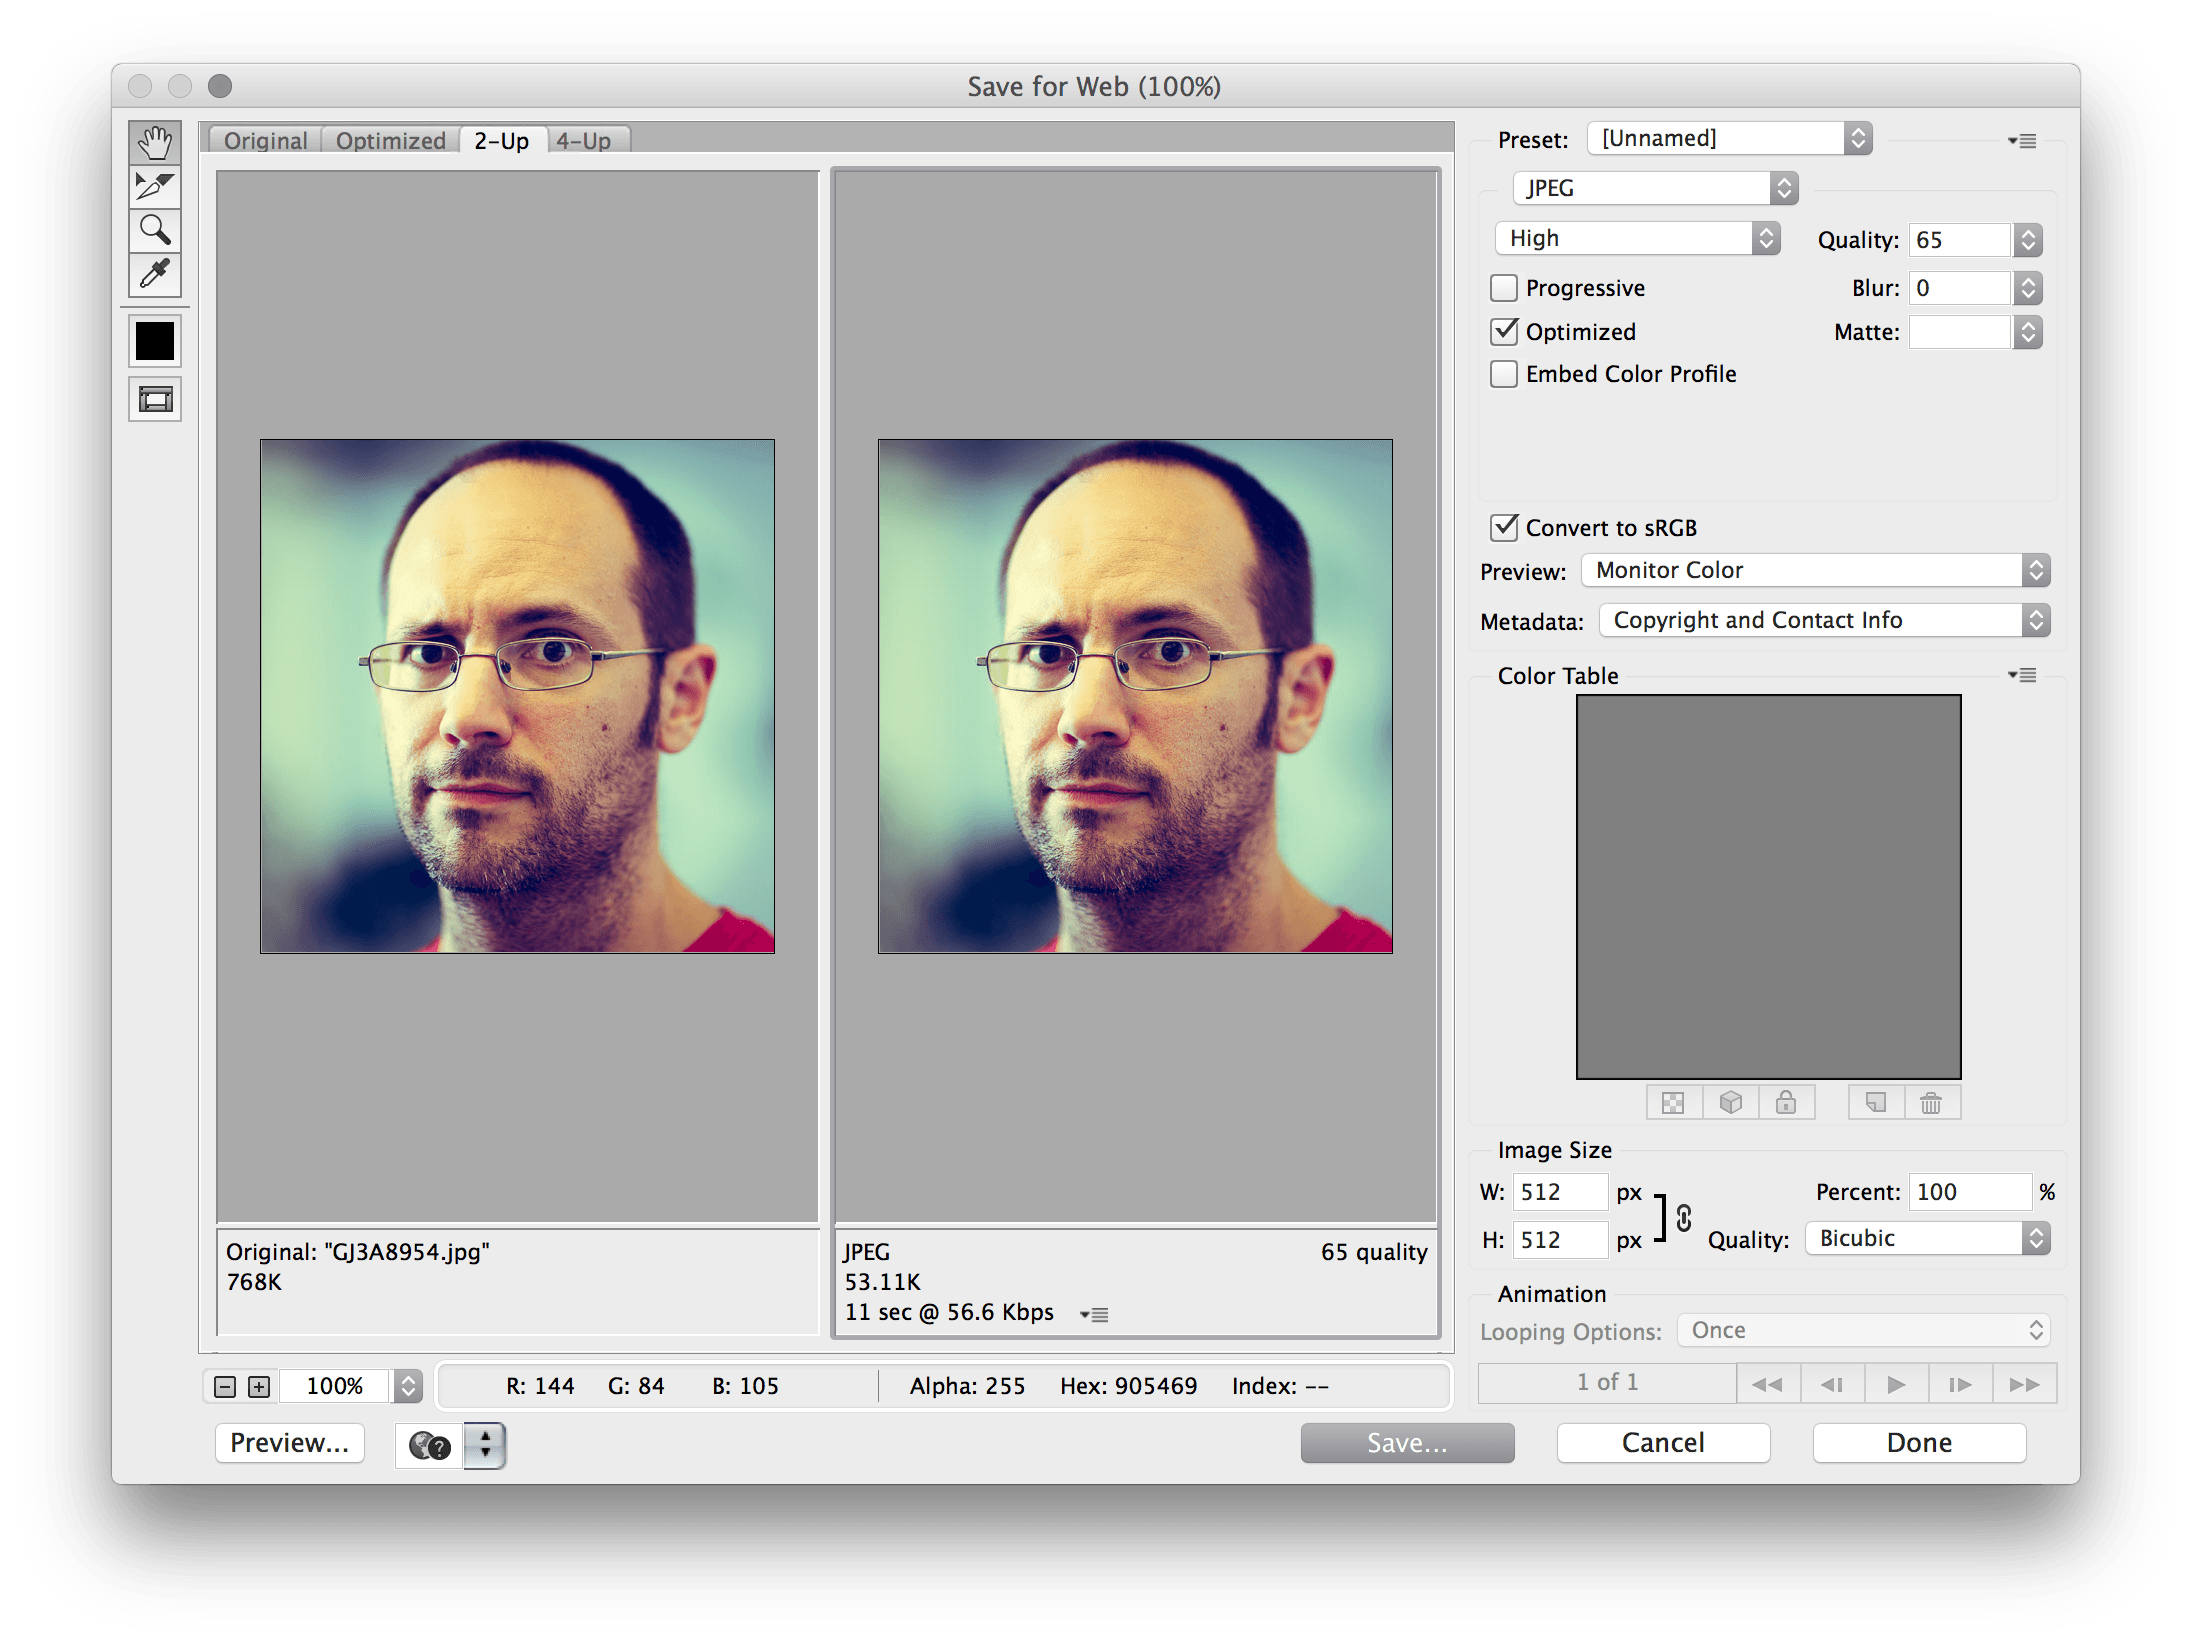
The main control you need to worry about here is the “Quality” slider. This adjusts the amount of compression applied to the image and will affect the overall quality. Try playing with this control to get a feel for how it affects the final image. You will also see how it affects the file size of the image (shown at the bottom). 65-75% is generally a good starting point, but you may be able to get away with a lower value for certain kinds of image. Conversely you may have to set it higher to get a result you are happy with. Use your judgement here.
Optimising PNG
There’s a bit more to think about when saving a PNG file. PNG files can store images in a variety of colour depths and with 1-bit transparency or an 8-bit alpha channel.
The first thing you need to decide when creating your PNG file is the target colour depth. Complex images could potentially require the full 24-bit, but many images – particularly simple images like logos – will work well as 8-bit paletted images, and will be a good deal smaller too.
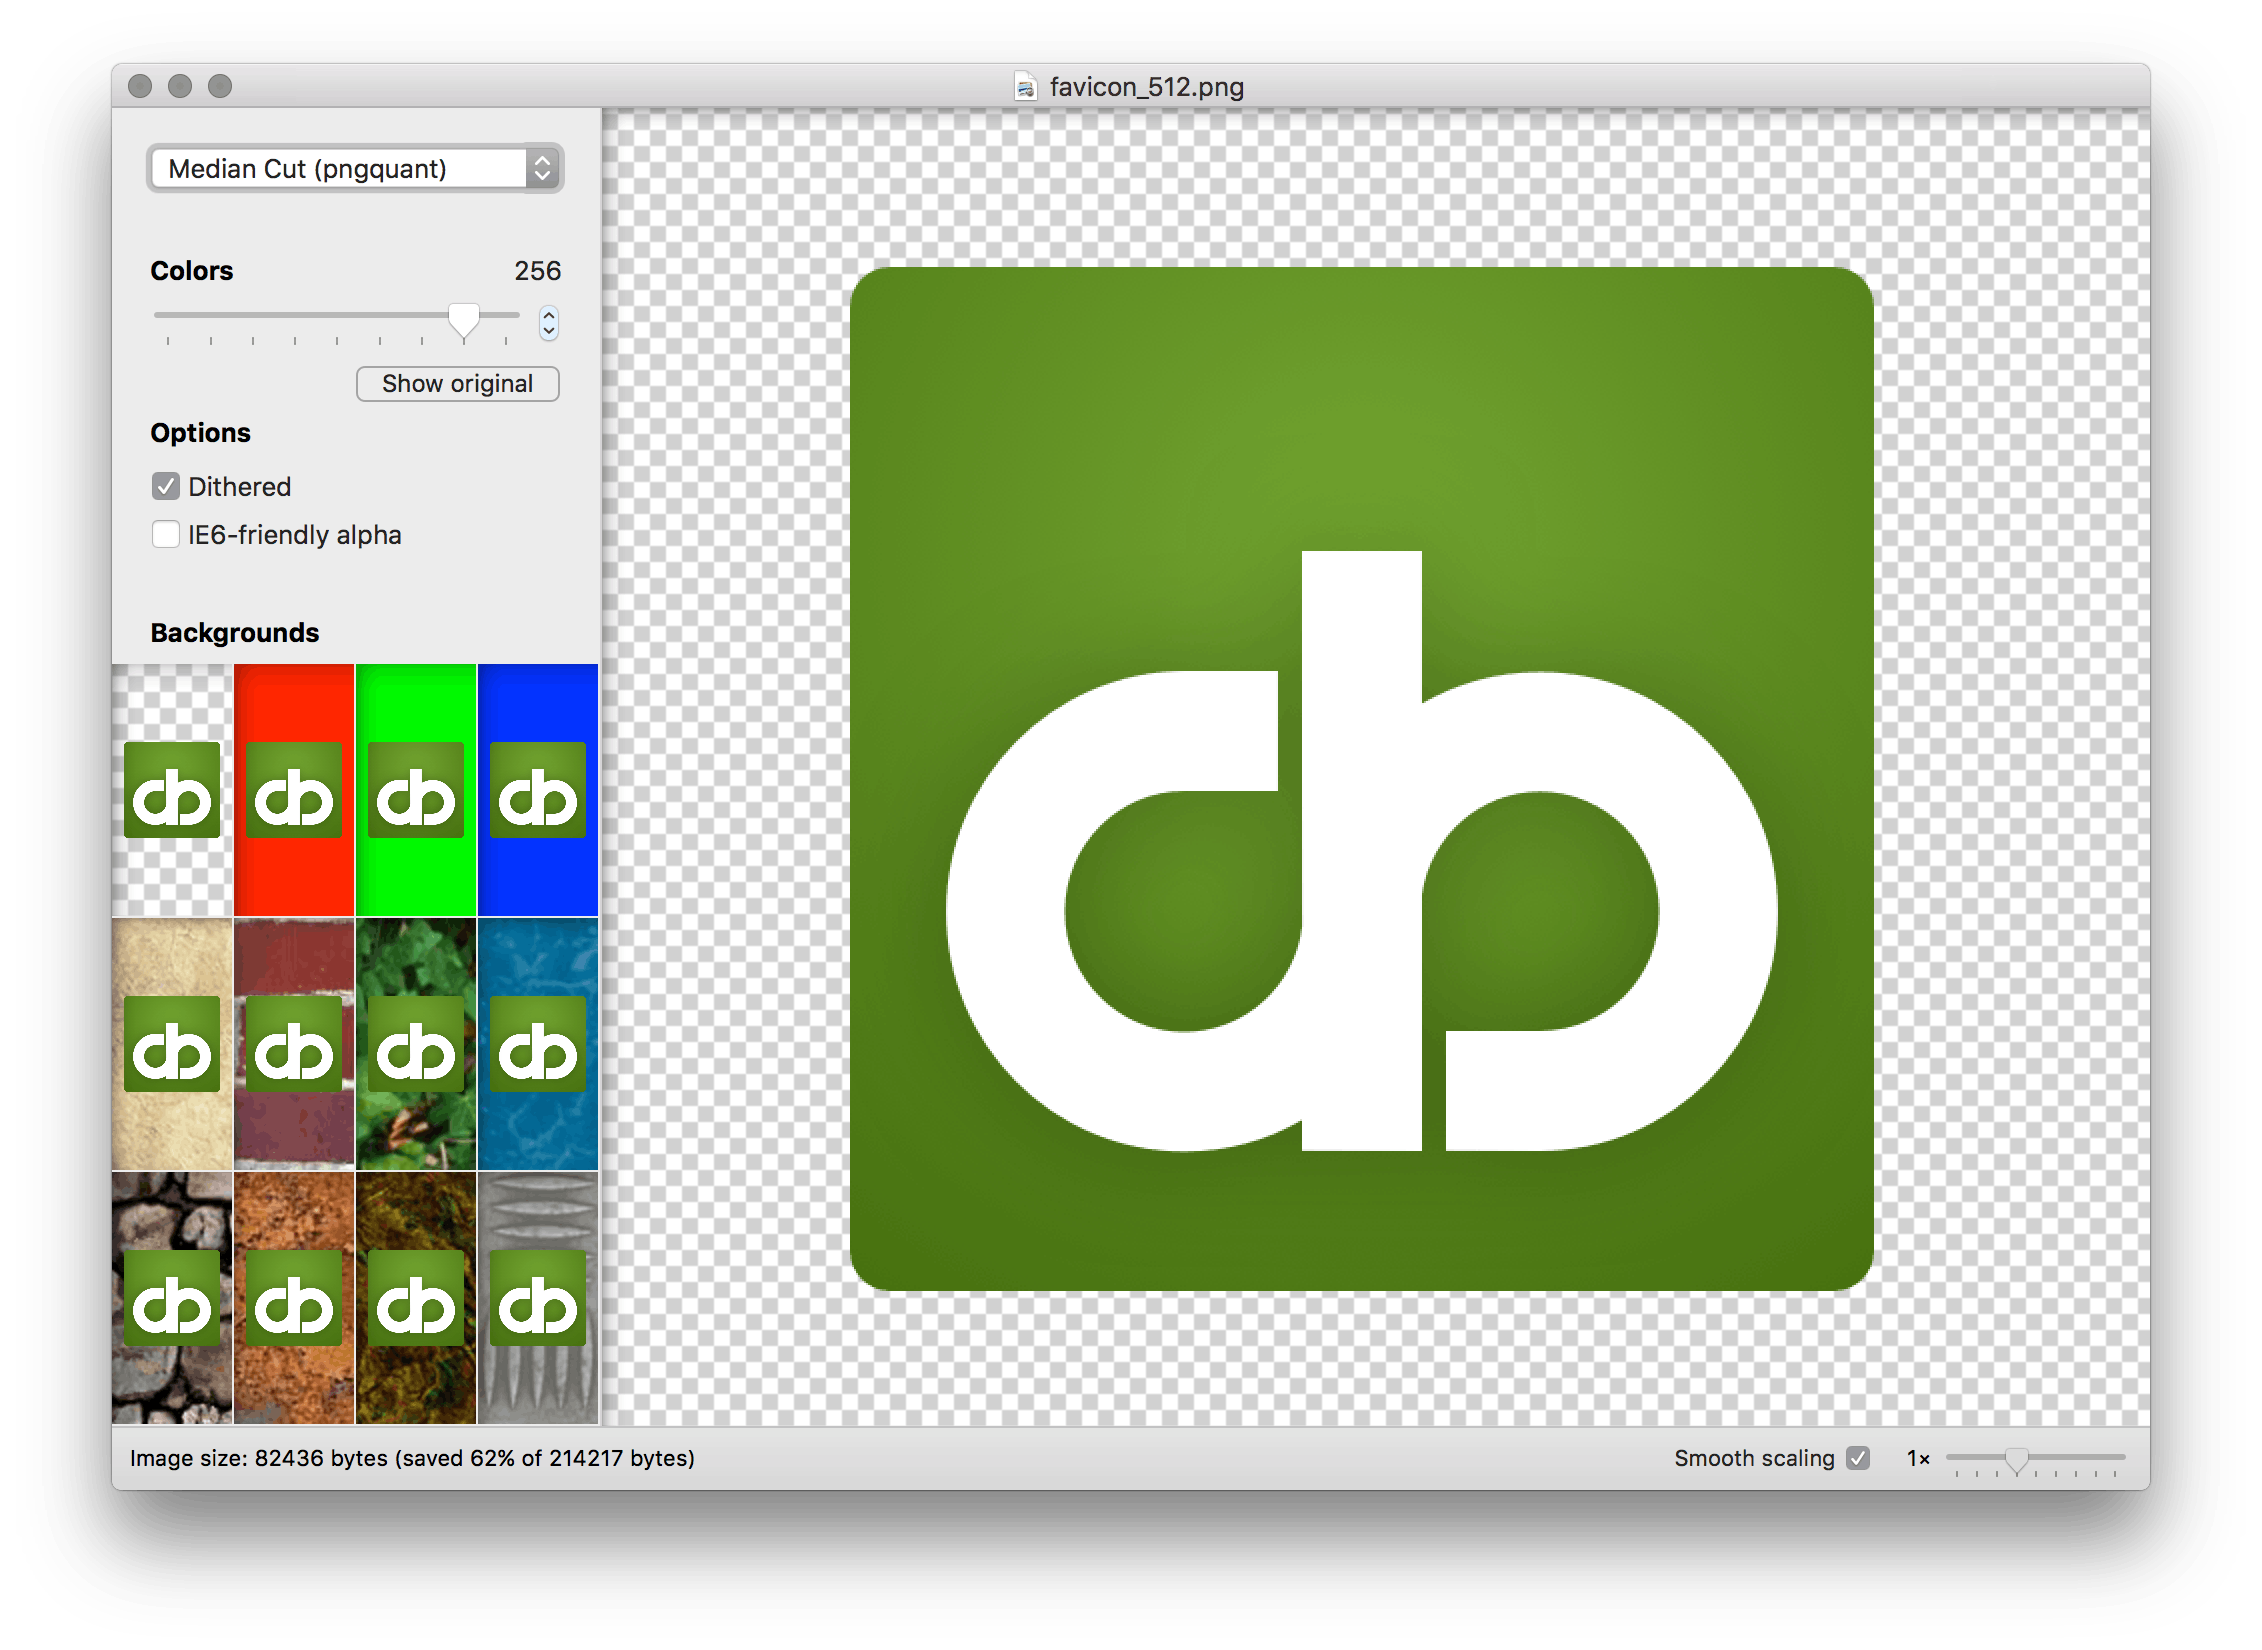
Most image editing applications will only let you export a PNG file with an 8-bit alpha layer if you select 24-bit colour. This is a limitation of the application and not the format. You can use ImageAlpha (OS X) or PNGoo (Windows) to reduce a 32-bit RGBA image down to an 8-bit paletted image while retaining the alpha transparency. Both of these tools use pngquant to do the conversion. Simple images can often be reduced to 32 or 16 distinct colours, offering further savings!
There are some useful tools to enable you to further compress PNG images:
ImageOptim: An OS X application that will run your images through various lossless compression tools. OptiPNG, PNGCrush, and Gifsicle are some of the tools that it will use to strip and crush your images down in size without losing quality. The savings depend on the image you are compressing but can be anything from 10% to 75% of the original size. ImageOptim will also work with JPEG images but the savings are usually not that great.
There is a command line version of ImageOptim available which would be useful to incorporate these optimisations as part of a build process.
If you are running Windows you can try FileOptimizer as an alternative. On Linux you can use Trimage. All of these GUI tools use a similar combination of command line tools to optimise images.
Happy optimising!